
Send email newsletter in Ghost


In this tutorial I will guide you through the process of setting up an email newsletter in your Ghost blog and sending your very first newsletter to all your members.
The configuration is very easy and requires you to have just 3 things:
- A running Ghost blog (get one for free at www.digitalpress.blog)
- Members feature enabled
- A Mailgun account for sending emails
Creating a Mailgun account to send emails
Sending emails from your Ghost blog requires you to create and configure a Mailgun account in your Ghost blog. Mailgun is a professional service for sending emails to your subscribers and is fully integrated with Ghost. Mailgun offers free and paid subscriptions to send email and is a great choice to get you started with sending email newsletter to your subscribers.
First create an account with Mailgun, if you don't already have one, and sign in to Mailguns web dashboard. You will be asked to add your domain first. If your domain is for example example.com, set the domain name to example.com and pick the Domain region closest to your readers.

The domain region you pick is important later when we'll configure Ghost to send emails through Mailgun.
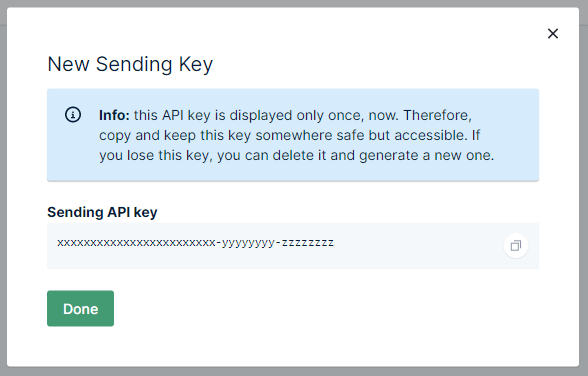
After you add your domain, head over to Sending > Domain settings in the left navigation of Mailgun and switch to a section called Sending API keys. This section allows you to create an API key. You will need an a key to configure Ghost blog to send emails from your domain.
Add a new key and save the provided Sending API key somewhere because we will need it later when configuring your Ghost blog.
Now you're all done in Mailgun. Let's head over to your Ghost blog to configure sending of emails.
Configure Ghost blog to send emails with Mailgun
Sign in to your Ghost blog and go to Settings > Labs section in the left navigation. Members are configured in the Members section.

Enable the members feature and scroll down to a section called Email newsletter settings. This section allows you to configure Mailgun settings to start sending your newsletter. You will need the Mailgun configuration details we have created in the previous section.

Configuring email newsletter
- Select a Mailgun region according to the Domain region you picked in the first part of this tutorial.
- Enter the domain name from which you wish to send emails in the Mailgun domain field. In our case it is example.com as configured in the first section.
- The Mailgun API key is the sending API key we created and saved in the last section of configuring Mailgun. Copy and paste the Mailgun API key into this field.
Once everything is done, hit Save settings in the top right corner and you're all set to start sending your email newsletter ✨🎉❤️
Sending your first email newsletter from Ghost
Sending an email newsletter is really simple. Let's create your first blog post so we have some content for our readers 😎
Before you publish your blog post, you will see an option to send it by email to all your subscribed members.

Enable the switch and publish your blog post. That's it. Your blog post has just arrived to email inbox of all your subscribers.
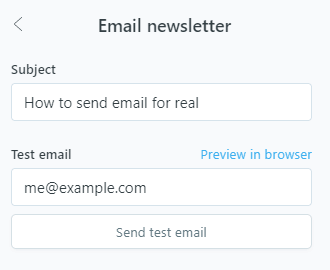
Before you send the email, you may want to preview how it looks. Go to the Post settings, scroll down to the Email newsletter and send yourself a test email.
Final thoughts
In this tutorial we have learned how to configure email newsletter in Ghost using a Mailgun account and how to send emails to all your subscribers. Email newsletter in Ghost is a great tool to keep your community engaged.
Share with us your stories how email newsletter made your blog more successful.
In case you don't already have a Ghost blog, head over to www.digitalpress.blog where you can get a free Ghost blog in just a couple of clicks.